Overview
The Photos page shows every photo your crews take on visits, in one place. Use it to find a job’s photos fast, send them to a customer, choose which ones show in the client portal and label them with tags.
Click Photos in the left menu.
Photos show newest first, 60 at a time. Click Load more photos at the bottom to see more. Click any photo to open it full size.
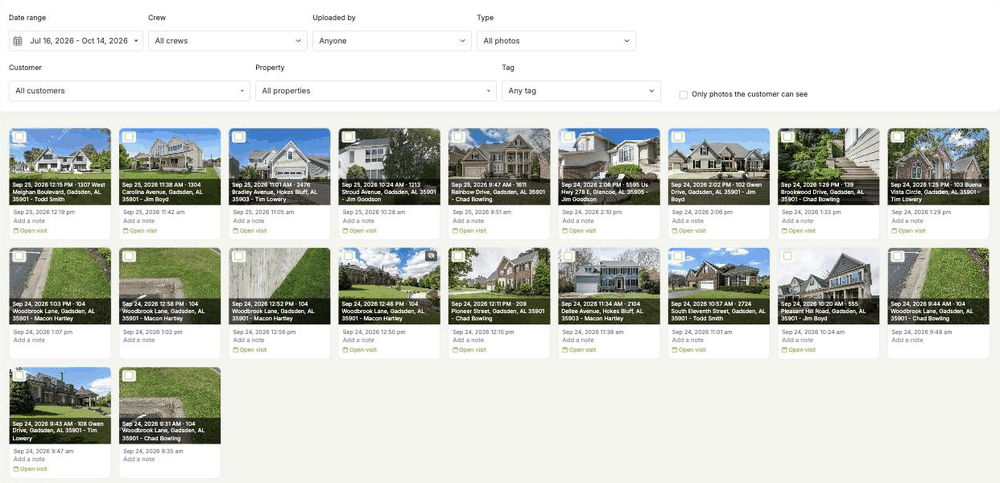
What’s on the Photos page
- Visit photos: photos added to a visit on the schedule or in the app.
- Before & after photos: before-and-after pairs from visits.
When you open Photos for one customer or property, it also shows photos uploaded straight to that customer or property record.
Each photo shows the date and time it was uploaded. Click Open visit under a visit photo to see that visit’s details.
Filter your photos
Use the filters at the top. The page updates as soon as you change one.
- Date range: starts with the last 90 days.
- Crew: photos from visits for one crew.
- Uploaded by: photos one employee uploaded.
- Type: All photos, Visit photos or Before & after.
- Customer and Property: start typing a name or address.
- Tag: photos with one tag.
- Only photos the customer can see: hides photos that aren’t in the client portal.
On a phone, tap Filter Options to show the filters.
Tip: the page address keeps your filters. Bookmark it or send it to someone on your team to open the same view.
See all photos for one customer or property
On a customer’s page, click View All Photos at the top. On a property’s page, click View All Photos too. Photos opens already filtered to that customer or property, going back three years.
Add a note to a photo
Click Add a note under a photo, type your note and press Enter. Press Esc to cancel. The note is saved on that photo and shows when you share it. Use it for things like “Please move these chairs before Thursday.”
Select photos
Check the box on each photo you want. A bar appears at the top with how many you’ve selected. Use Select all on page to pick every photo showing, or Clear to start over.
With photos selected, you can share them, show or hide them in the client portal or tag them.

Share photos with a customer
- Select the photos (up to 60).
- Click Share.
- Enter an email in Email to, a mobile number in Text to, or both. Leave both blank to just get a link.
- Add a Note if you like. It shows once, above the photos.
- Under Include with each photo, choose what to show: Date, Time, Address, Name and Crew.
- Click Create link.
LawnPro creates a link and sends it to the email or number you entered. Click Copy link to paste it anywhere else. Anyone with the link can see those photos. The link stops working after 30 days.
Show or hide photos in the client portal
- Select the photos.
- Click Show or Hide. The buttons name the customer when all the photos belong to one customer, for example Show in Jane Smith’s portal. When they belong to several customers they read Show in customer portals and Hide in customer portals.
- LawnPro lists which customers’ portals will change. Click OK to confirm.
Photos hidden from the portal have a crossed-out eye icon in the corner.
Good to know:
- Before-and-after photos show in the portal as a pair. Showing or hiding one photo changes its partner too, and LawnPro tells you when that happens.
- Photos uploaded straight to a customer or property record don’t show in the client portal. They always have the crossed-out eye icon.
- Photos that can’t appear in a portal are skipped, and LawnPro tells you how many.
Tag photos
- Select the photos.
- Click Tag.
- Type a tag name and click OK.
These are the same tags you use elsewhere in LawnPro. Use the Tag filter later to find them, for example every photo tagged “Damage” or “Install.”
Videos
Videos show in the grid with a play button. Playing them needs the video add-on. Without it you’ll see Upgrade to Play.