Table of Contents
Overview
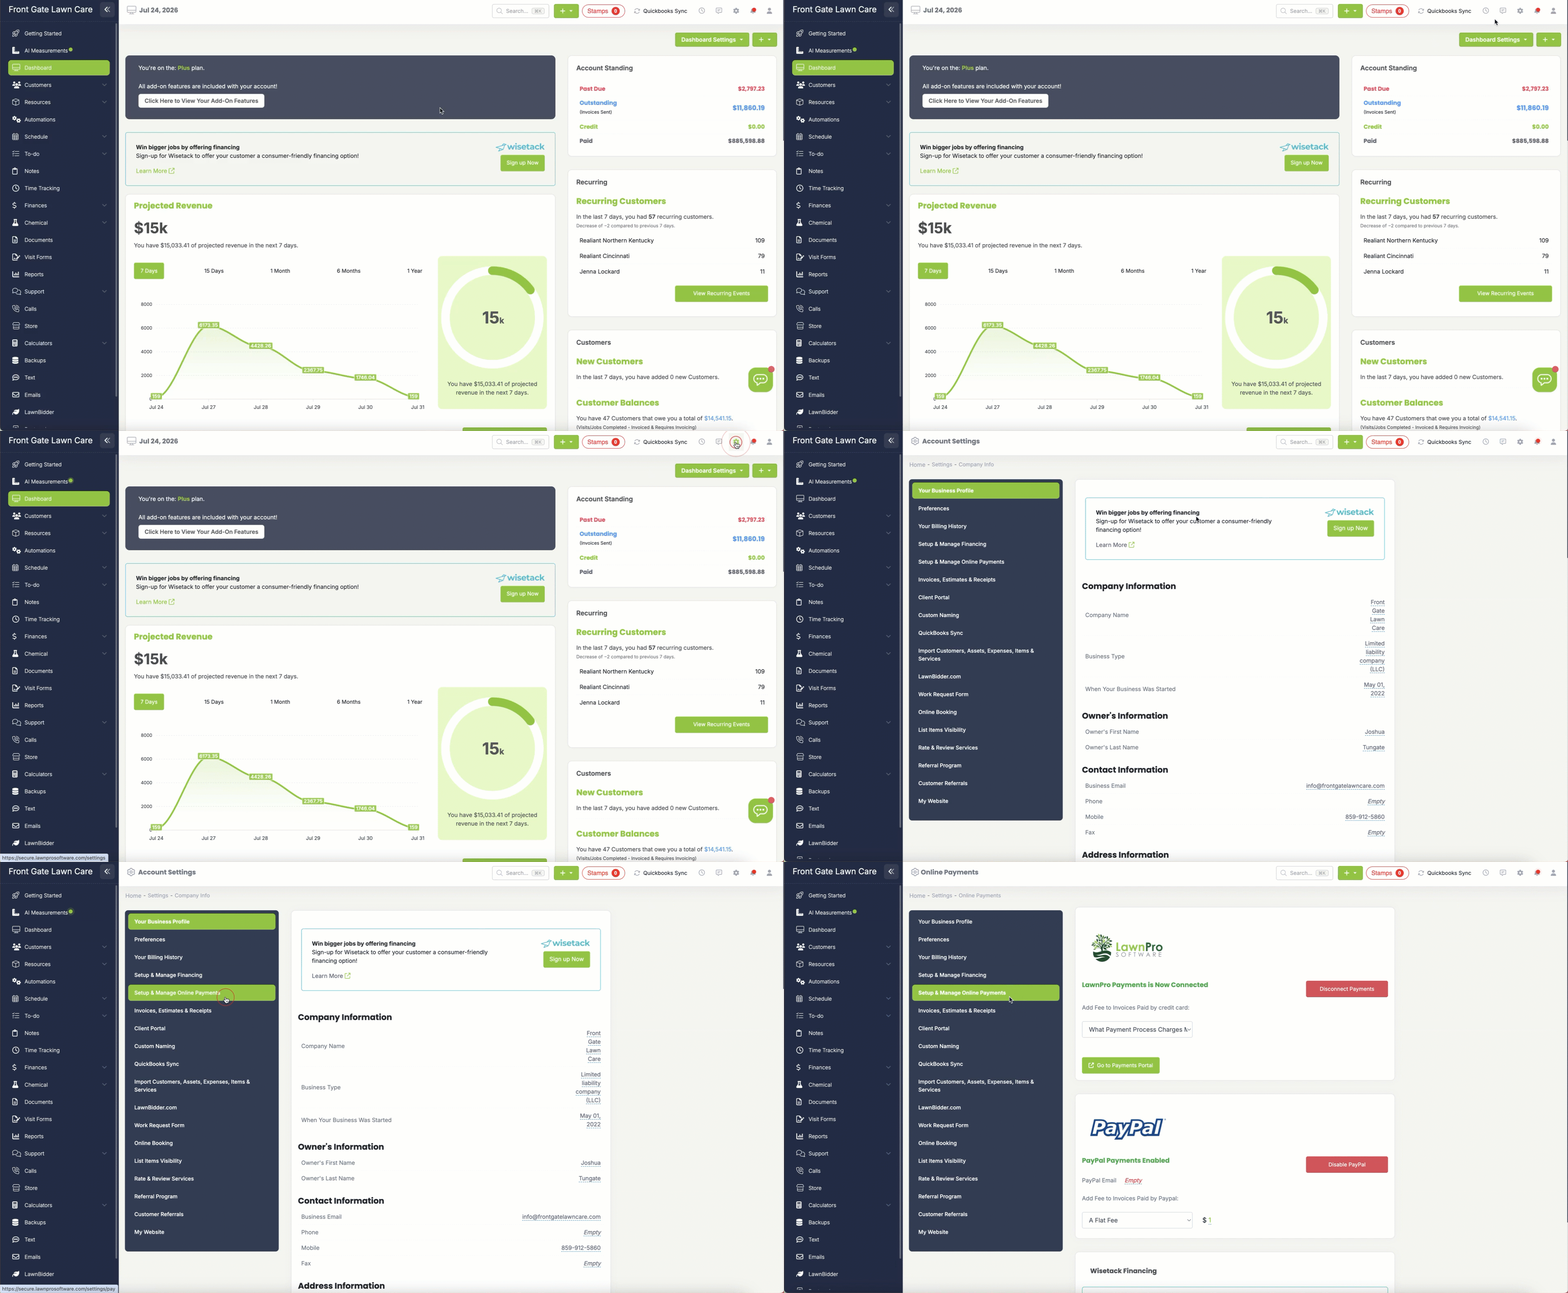
If you are looking to set up or edit your online payments settings, whether that be through Lawnpro payments or paypal, you will go to the gear icon at the top right of the screen to access your settings.
Then click on the “Setup & Manage Online Payments tab.
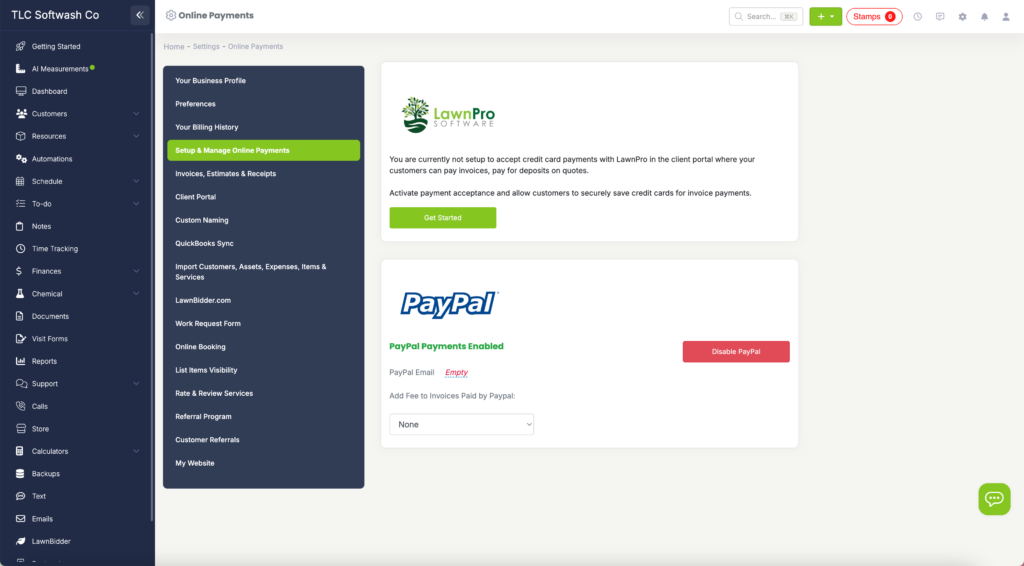
If you have not set up your LawnPro Payments or linked your Paypal will see the options to do so on this page.
LawnPro Online Payments
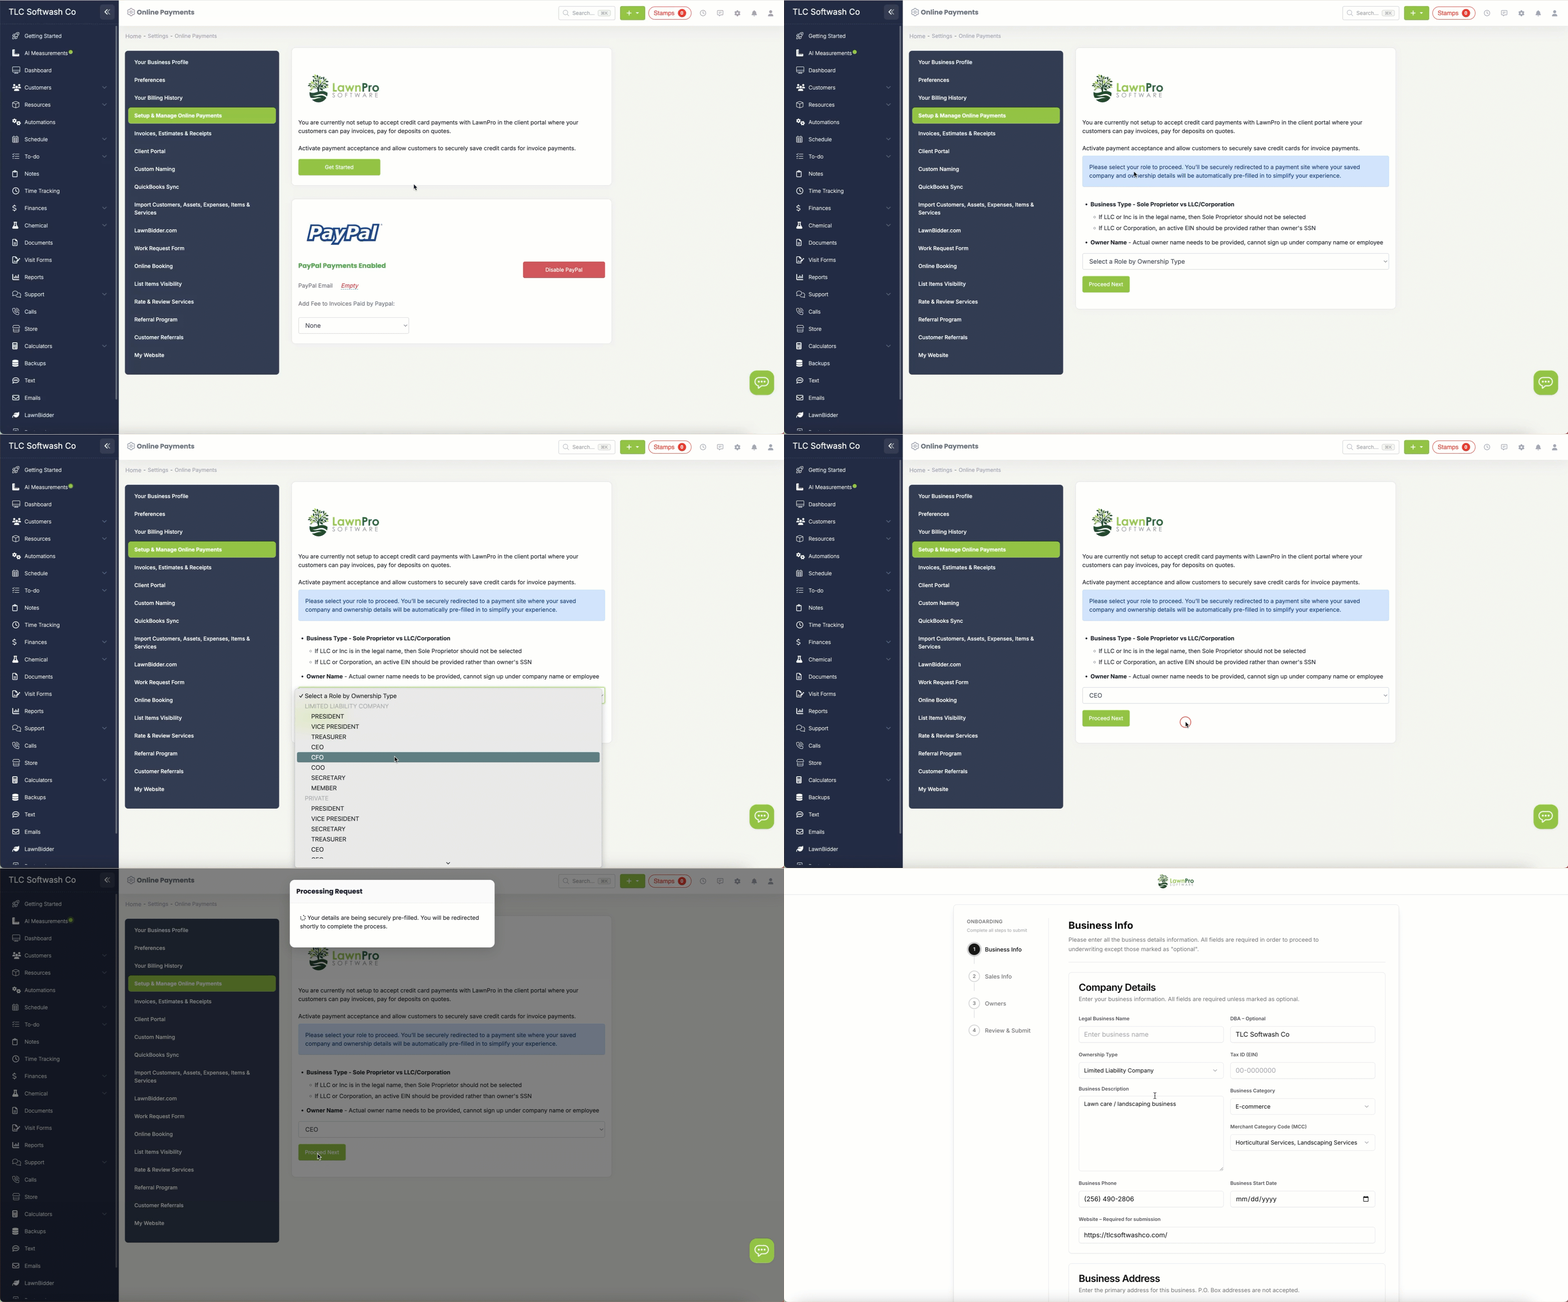
For LawnPro Online Payments, click the Get Started button to start your application. (If your account isn’t eligible yet, you’ll see Merchant Processing Not Yet Available instead.).
Select your role to proceed. You’ll be securely redirected to a payment site where your saved company and ownership details will be automatically pre-filled in to simplify your experience.
The Application
Step 1 — Business Info
You will need to provide your company details and business address. All fields are required unless marked as optional.
Company Details:
- Legal Business Name — Your official registered business name
- DBA (Optional) — The name your business operates under if different from your legal name
- Ownership Type — Your business structure (LLC, Sole Proprietorship, Corporation, etc.)
- Tax ID (EIN) — Your Employer Identification Number
- Business Description — A brief description of your business
- Business Category — The category that best describes your business
- Merchant Category Code (MCC) — For lawn care and landscaping businesses select Horticultural Services, Landscaping Services
- Business Phone — Your business phone number
- Business Start Date — The date your business was founded
- Website — Your business website URL (required for submission)
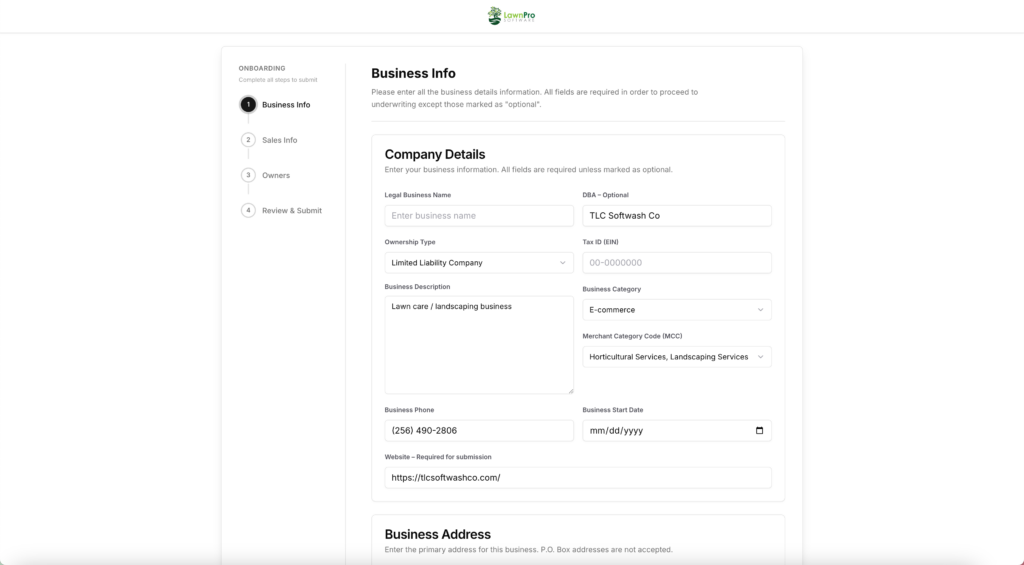
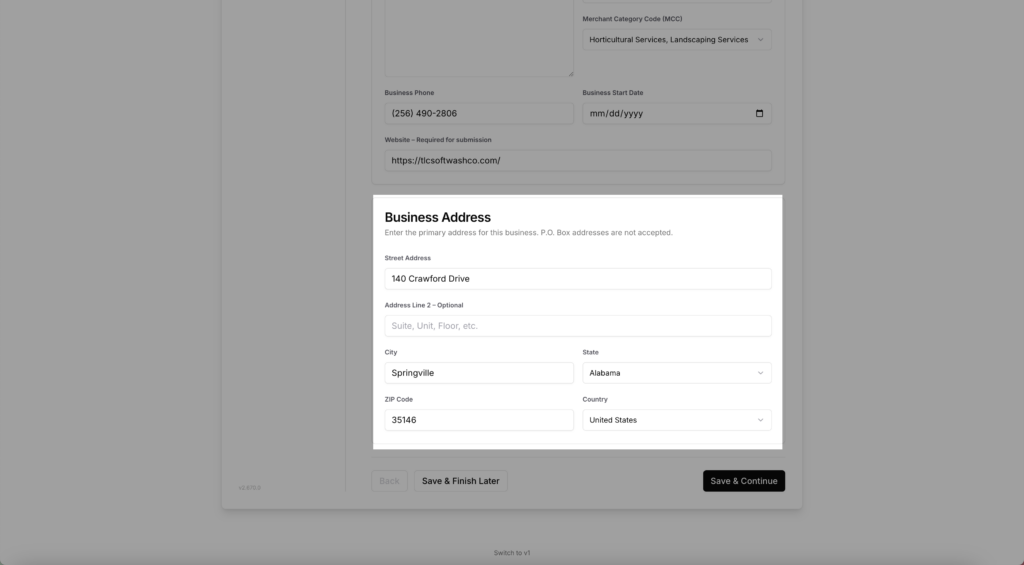
Business Address:
- Street Address — Your primary business address. P.O. Box addresses are not accepted
- Address Line 2 (Optional) — Suite, unit, floor, etc.
- City, State, ZIP Code, Country
Click Save & Continue to move to the next step. You can also click Save & Finish Later to save your progress and come back.
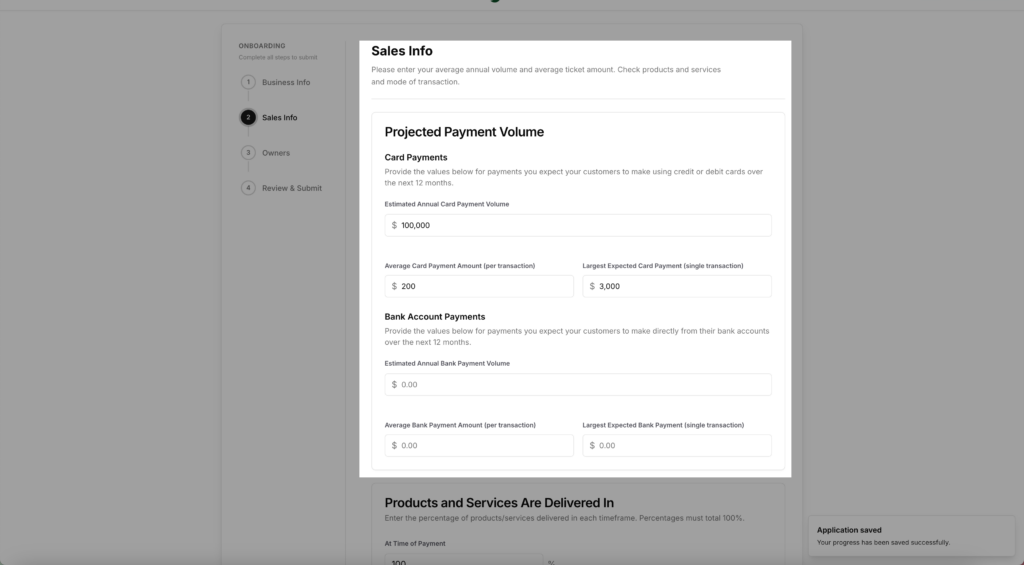
Step 2 — Sales Info
You will need to provide your projected payment volume and how your products and services are delivered.
Projected Payment Volume:
- Estimated Annual Card Payment Volume — Your estimated total credit and debit card payments over the next 12 months
- Average Card Payment Amount — Your typical card transaction amount
- Largest Expected Card Payment — The largest single card transaction you expect to receive
- Estimated Annual Bank Payment Volume — Your estimated total ACH/bank payments over the next 12 months
- Average Bank Payment Amount — Your typical bank transaction amount
- Largest Expected Bank Payment — The largest single bank transaction you expect to receive
Products and Services Are Delivered In:
Enter the percentage of your services delivered in each timeframe. All percentages must add up to 100%:
- At Time of Payment
- 1-7 Days After Payment
- 8-14 Days After Payment
- 15-30 Days After Payment
- Over 30 Days After Payment
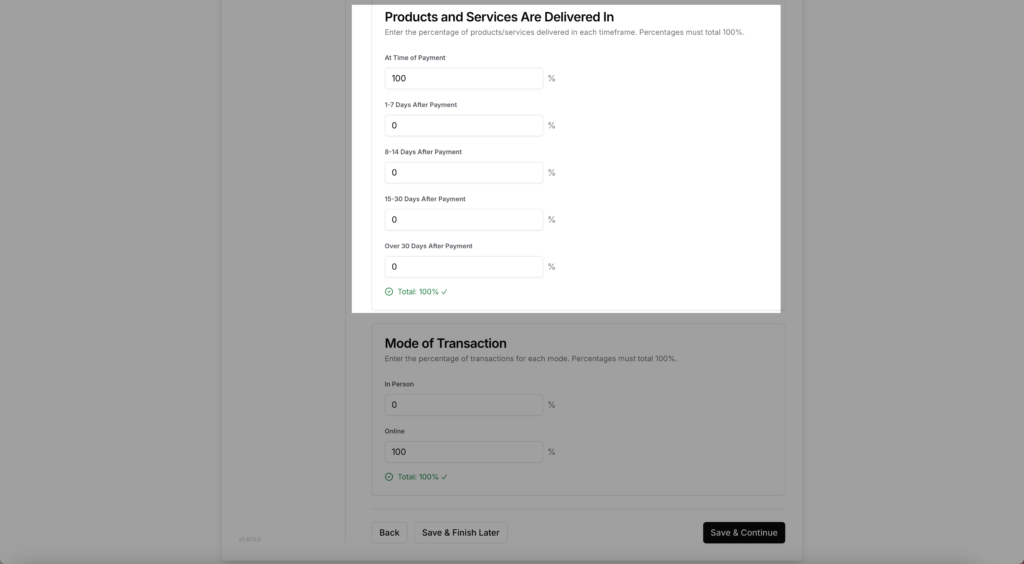
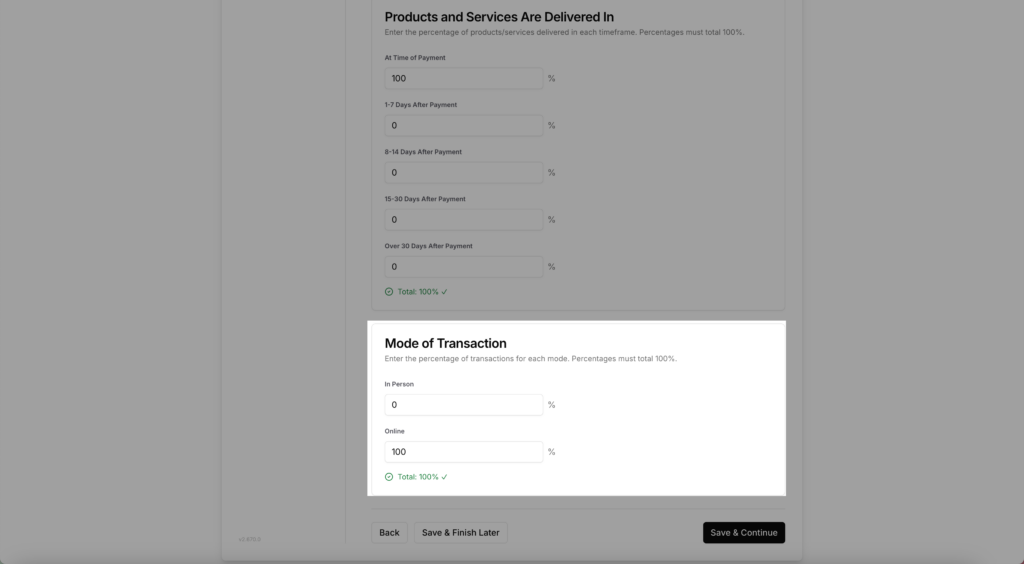
Mode of Transaction:
Enter the percentage of transactions for each mode. Must total 100%:
- In Person — Transactions completed face to face
- Online — Transactions completed through the customer portal or payment link
Step 3 — Owners
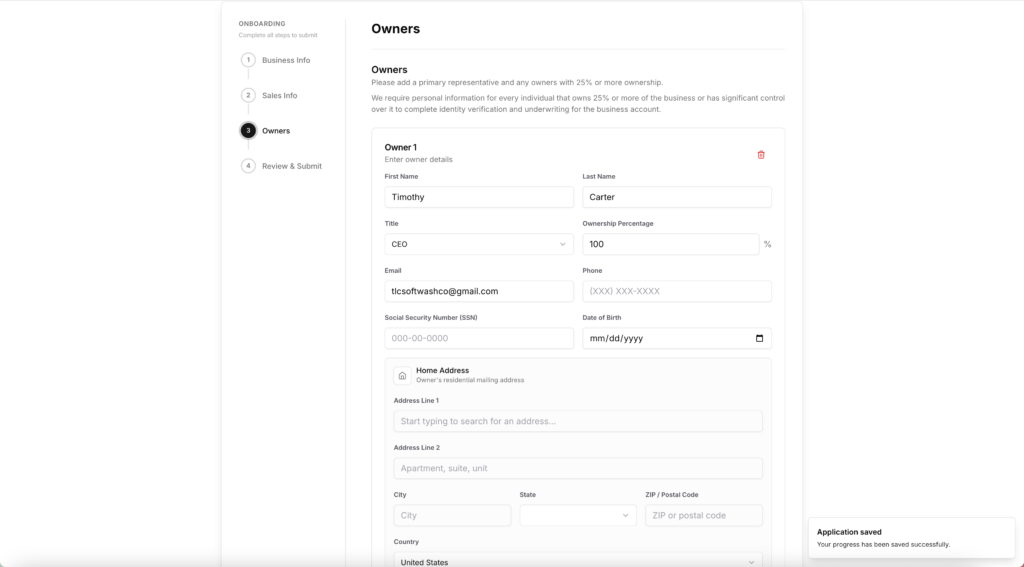
You will need to add a primary representative and any owners with 25% or more ownership. Personal information is required for identity verification and underwriting.
For each owner you will need to provide:
- First Name and Last Name
- Title
- Ownership Percentage
- Phone
- Social Security Number (SSN)
- Date of Birth
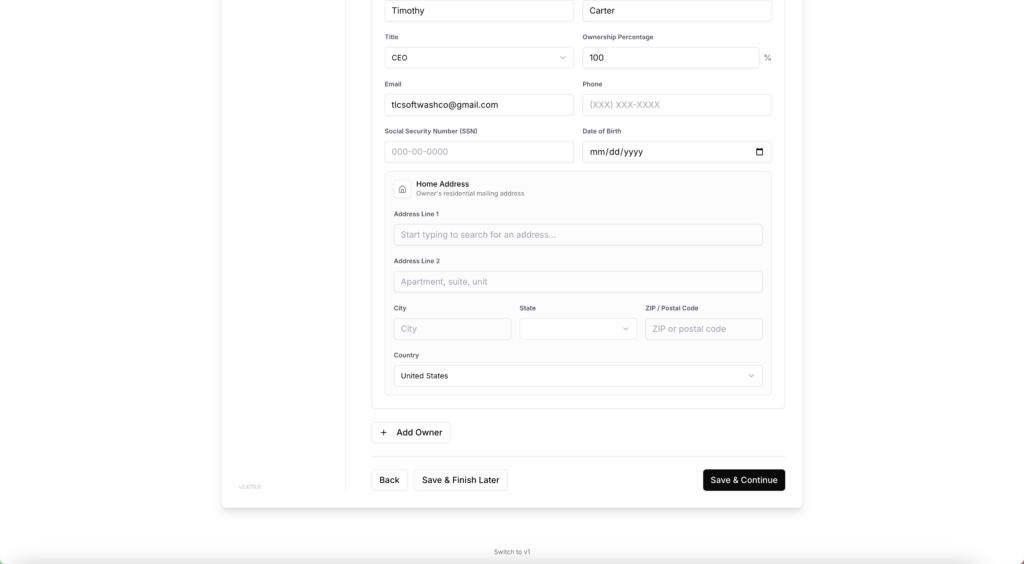
- Home Address (residential mailing address)
Click Add Owner if you need to add additional owners.
Step 4 — Review & Submit
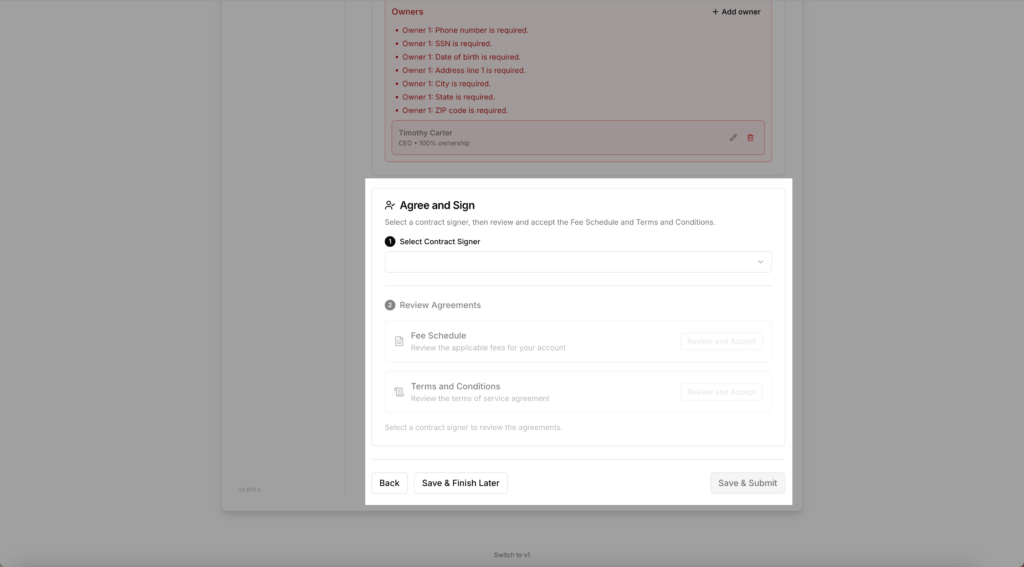
Review your application for accuracy. You will then need to:
- Select a Contract Signer — Choose who will sign the agreement on behalf of the business
- Review and Accept the Fee Schedule — Review the applicable fees for your account
- Review and Accept the Terms and Conditions — Review and accept the terms of service agreement
Once everything is complete click Save & Submit to submit your application.
Note: After submitting it may take a few business days to process your application. You will receive an email once a decision has been made.
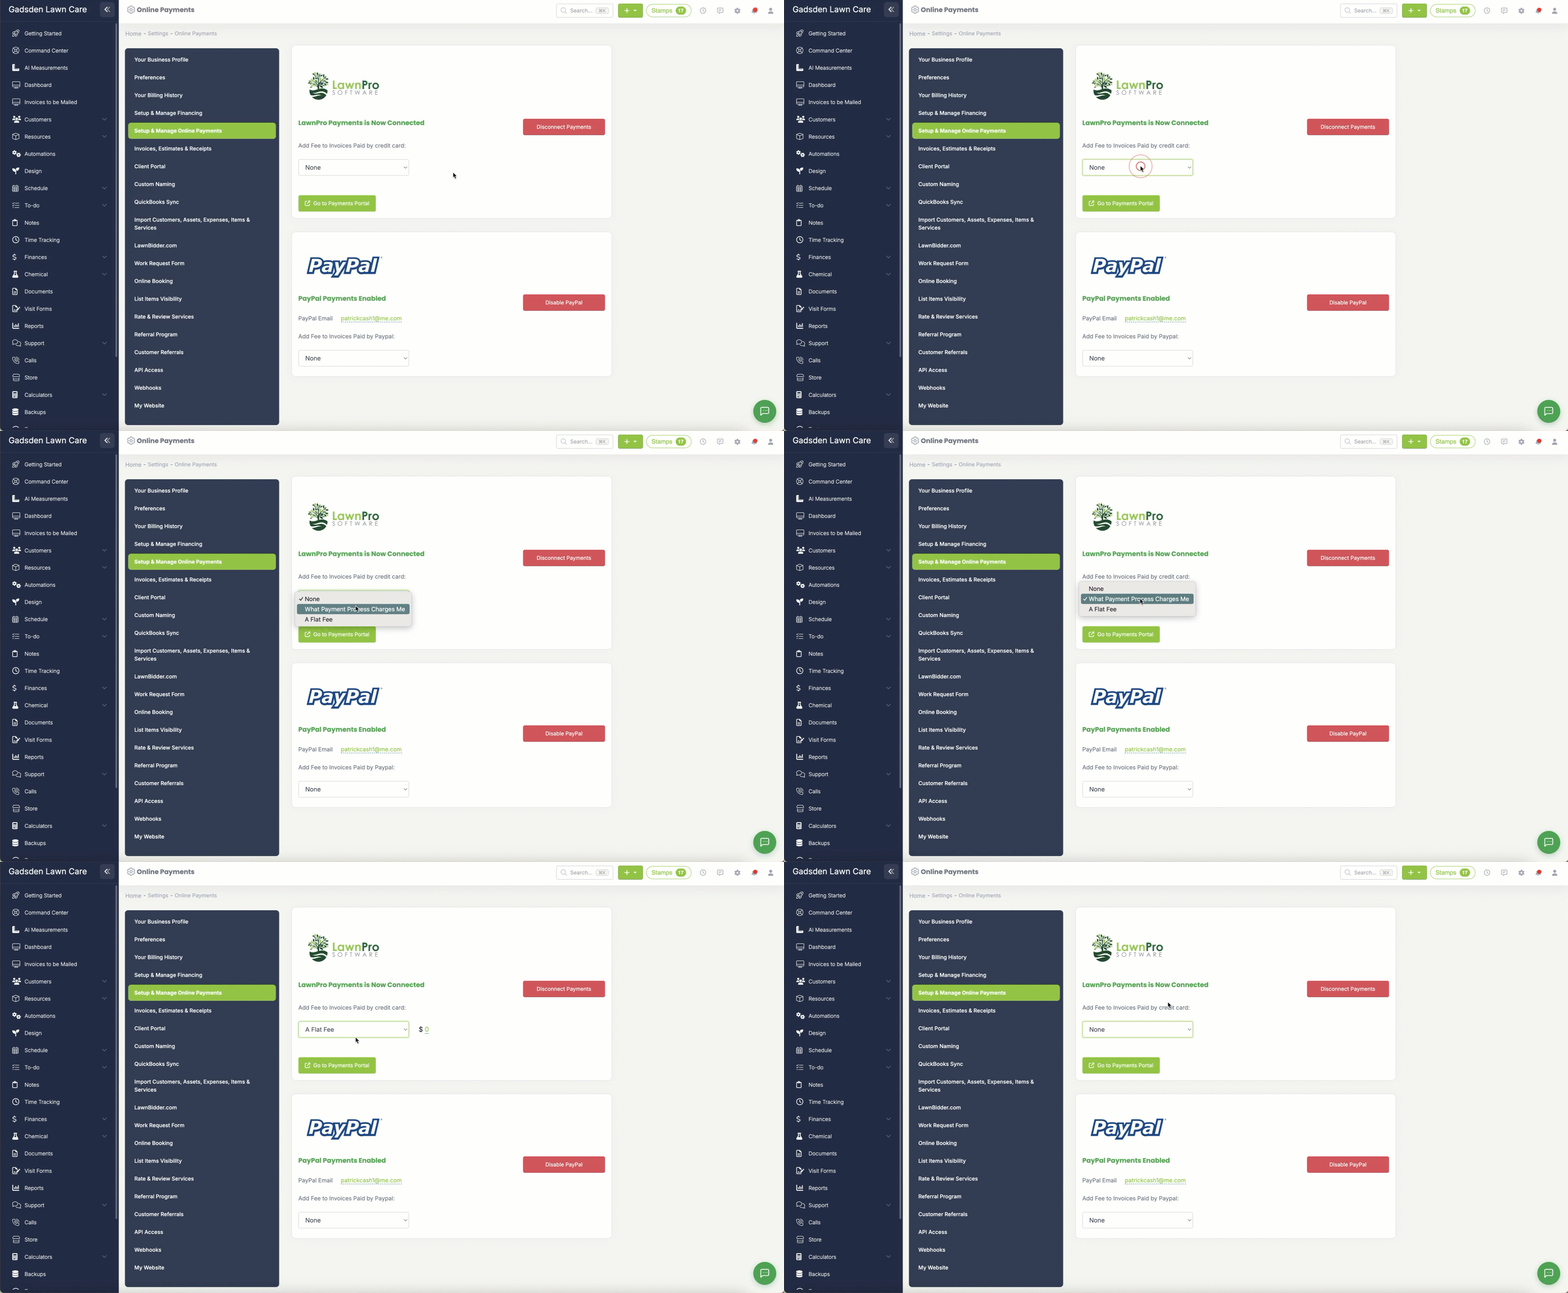
Once you are approved, you can choose to add no fees, add exactly what LawnPro payments charges, or a flat fee.
If you choose to add what LawnPro Payments charges or a flat fee, this amount will be added to an invoice when your customers pay online.
Paypal
For PayPal, click Enable Paypal (PayPal needs a paid monthly or yearly plan, or the client login widget) and enter your Paypal email address.
You can choose from no fee or a flat fee.
This will be added to any invoice your customer pays with Paypal.
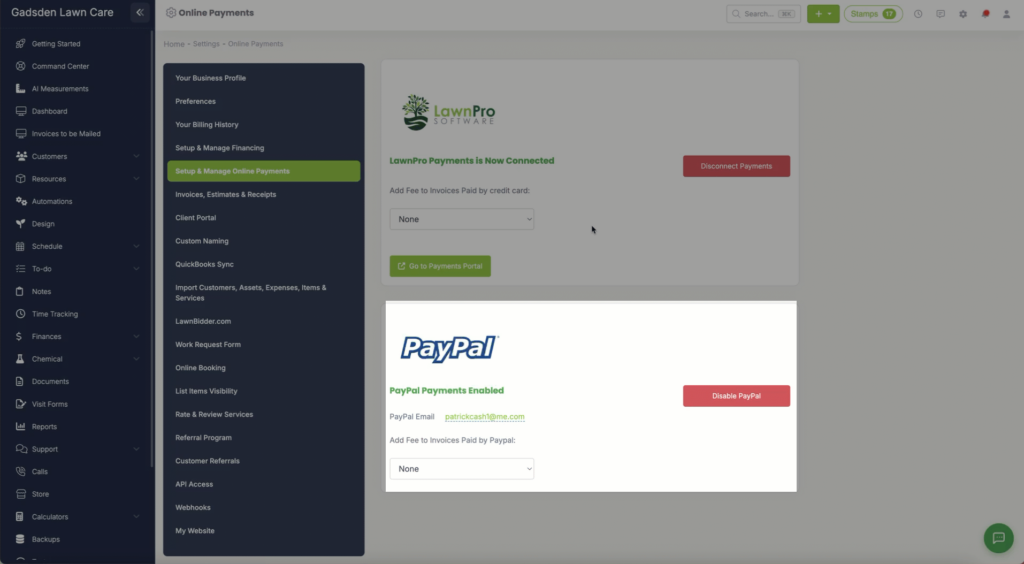
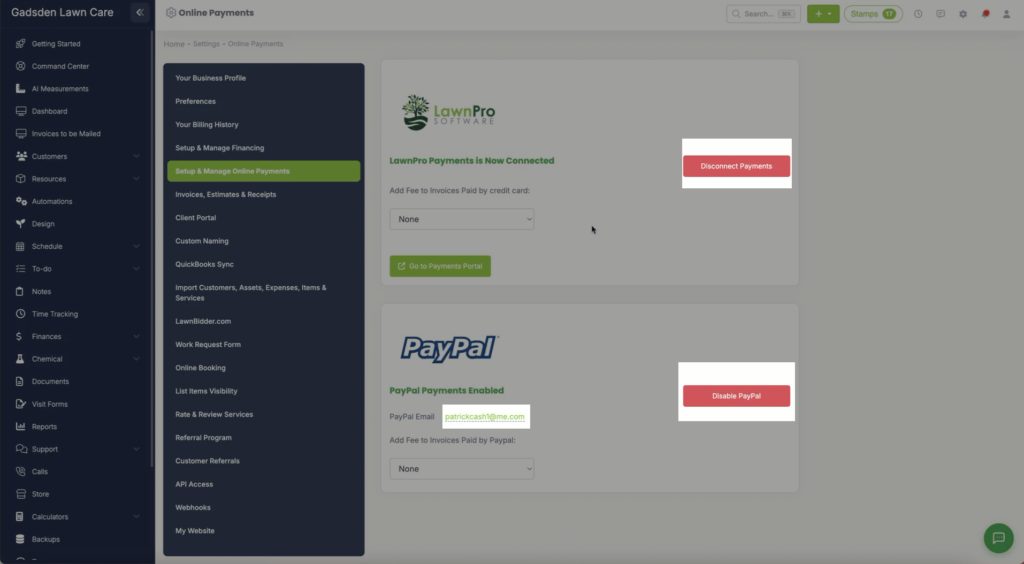
When you have set up Online Payments and Paypal you will see Disconnect Payments, Go to Payments Portal, and the options to disable or edit PayPal.