A Zap is an automated workflow that connects your apps and services together. Every Zap consists of a trigger step and one or more action steps. When you turn your Zap on, it will run the action steps every time the trigger event occurs.
There are two ways you can create Zaps: with a Zap template or from scratch.
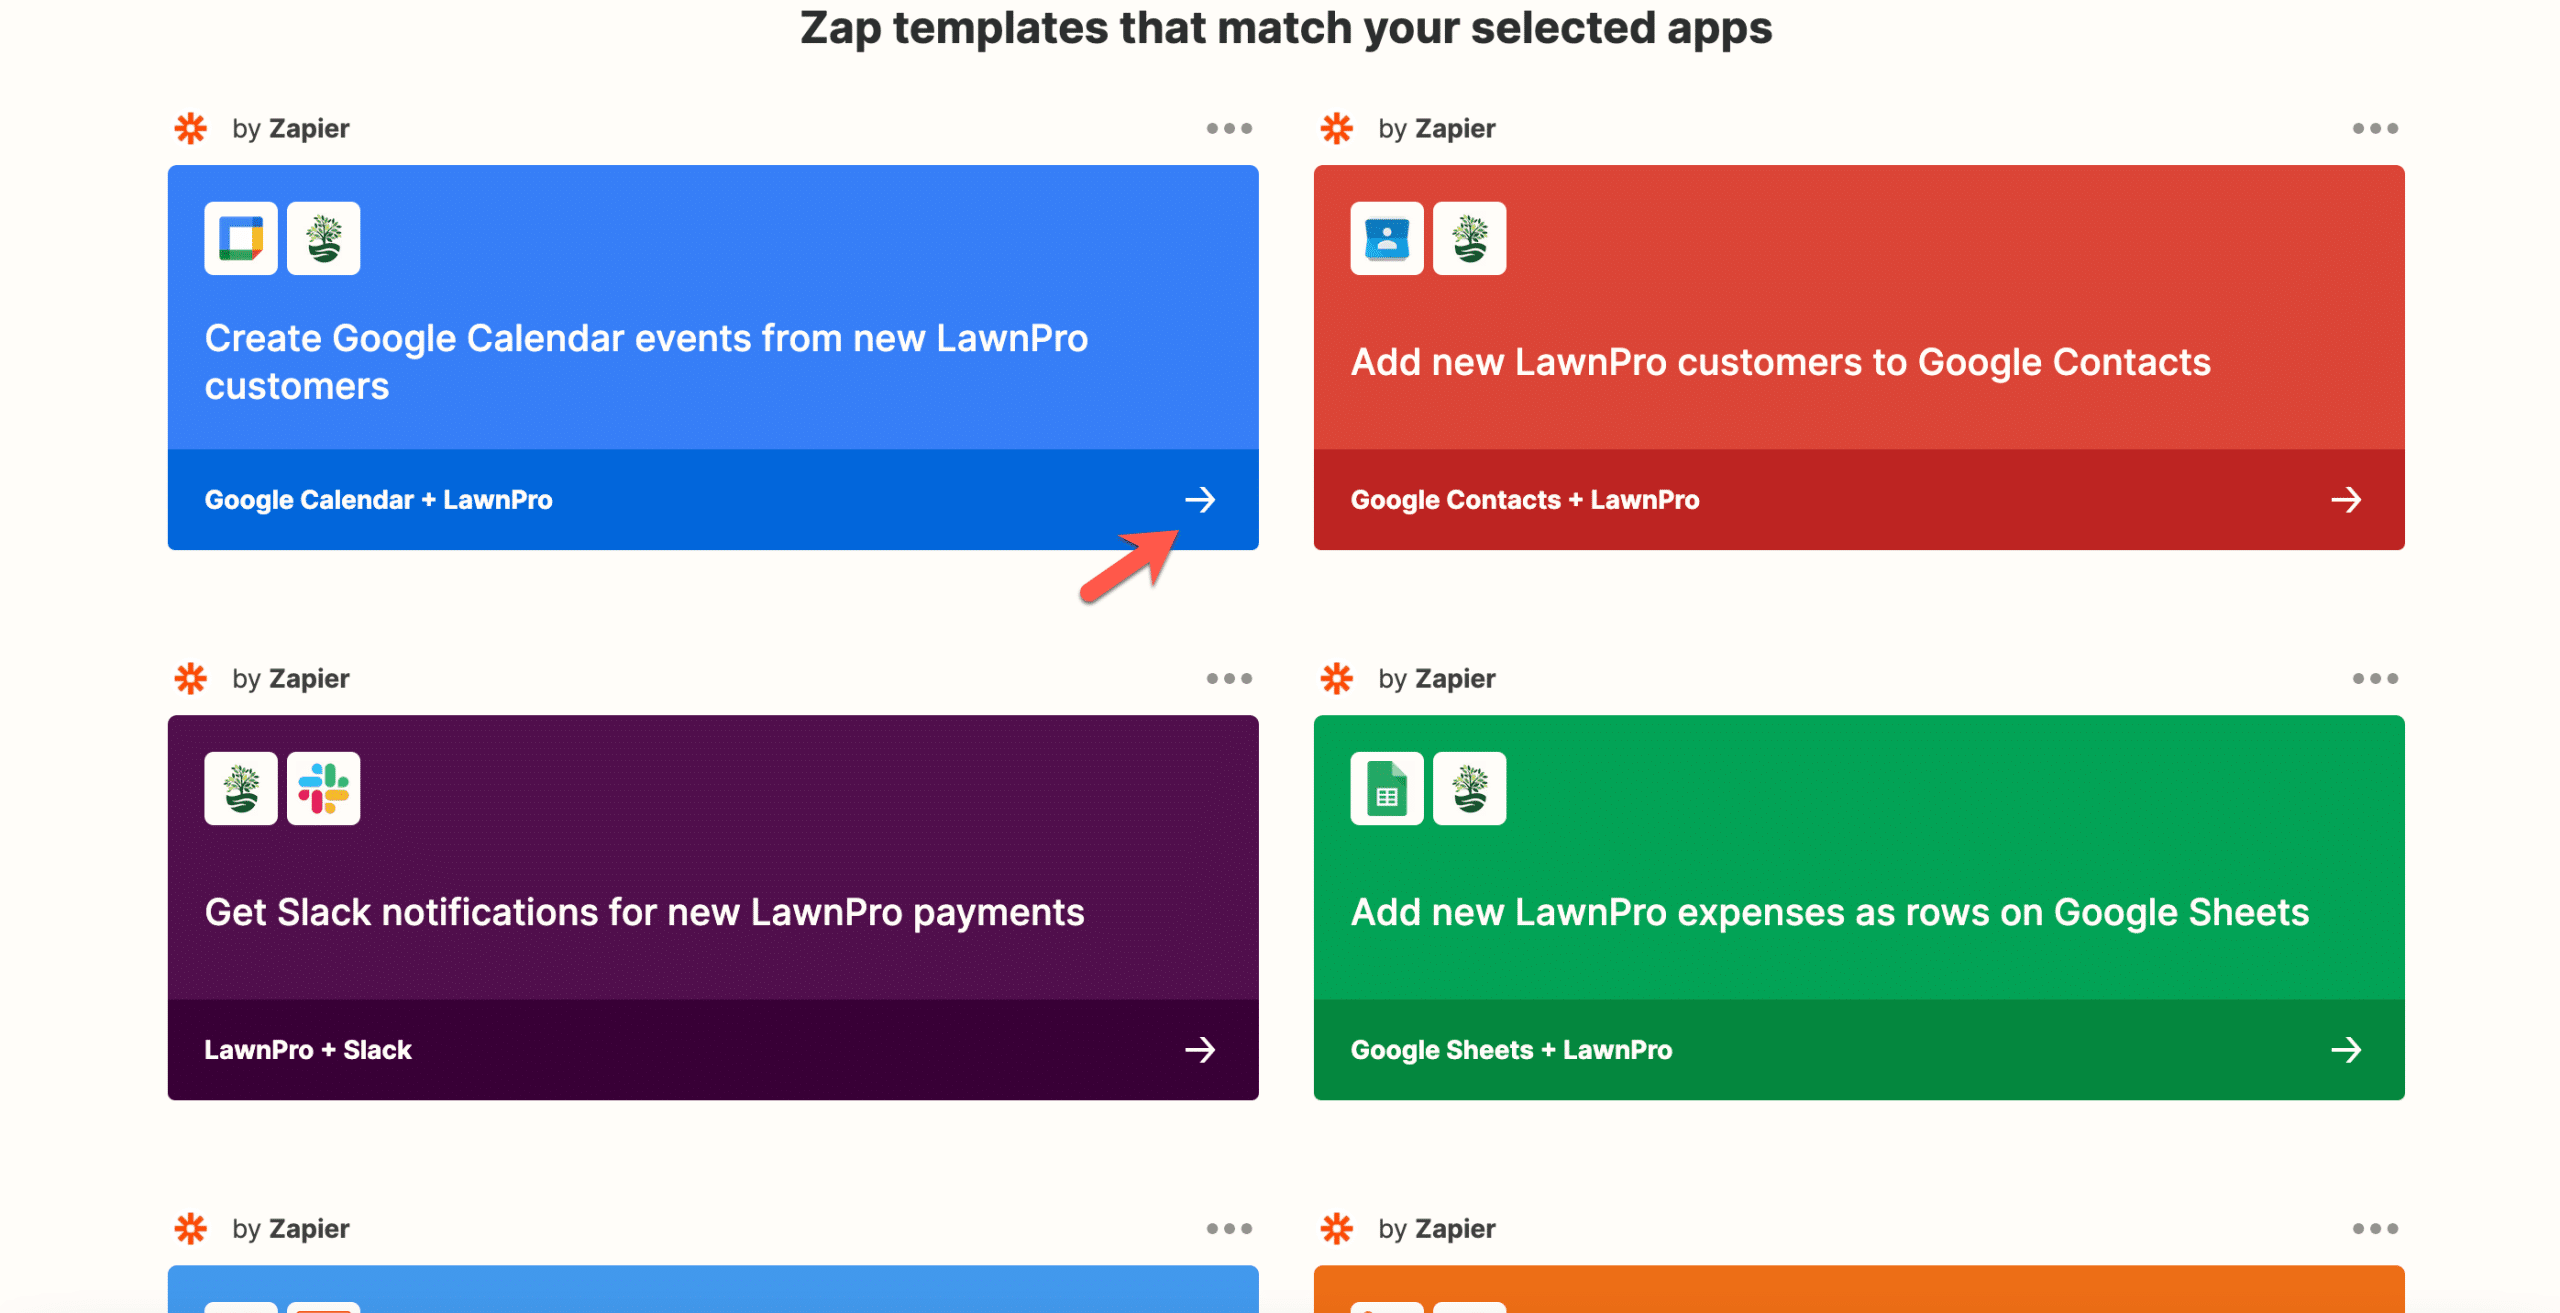
Create Zaps from templates
You can find pre-built Zaps (Zap templates) on your dashboard, the Zapier Explore page, the Zapier Blog, and on individual app pages.
To use a Zap template, click Try it or the arrow.
Create Zaps from scratch
You can also create your Zap from scratch. In your Zapier account, hover over the left sidebar menu and click Make a Zap.
Steps:
1. Add a Trigger
– Choose your trigger app: the Zap will be triggered by an event that occurs in this app.
– Select your trigger event: this will be the event that occurs in the selected app that triggers the Zap.
– Select your app account: select or connect the specific app account to use in the Zap trigger.
– Set up your trigger: set up your trigger options to fit your needs.
– Test your trigger: test your trigger to see if it pulls in the right data.

2. Add an Action
– Choose your action app: the Zap will perform an action in this app when it is triggered.
– Select your action event: this will be the event that the Zap performs in the selected app when it is triggered.
– Select your app account: select or connect the specific app account to use in the Zap action.
– Set up your action: set up the data that you want to send over to your action app
-Test your action: test your action to see if it’s working as expected.
When your action is set up successfully, a green checkmark icon will appear in the top left of the step. Learn more about setting up your Zap actions and searching for existing data in Zaps.

3. Optional: add more actions
If you’re on a free trial or paid Zapier plan, your Zaps are not limited to a single action. You can customize your Zap further with any of the following:
– Additional action steps: to add more actions, click the + icon after a step.
– Search steps: use a to find existing data in your apps.
– Filters: add filters to restrict your Zap from running unless certain conditions are met.
– Formatter: add Formatter steps to format data in a Zap, such as editing text or changing a date format.
– Delay: add a delay between Zap steps.
– Paths: add paths to perform different actions in your Zap based on different conditions (Professional plans and above).
4. Name your Zap
Next, give your Zap a name so you can easily identify it on your dashboard. In the upper left, click Name your Zap and enter a new name for your Zap.

To add more information about your Zap, give your Zap a description. In the right sidebar, click the gear icon to open the Settings tab, then enter your text in the Description field. Your changes will be saved automatically.
5. Turn on your Zap
After you set up and name your Zap, you’re ready to turn it on.
In the upper right, click to toggle the switch ON.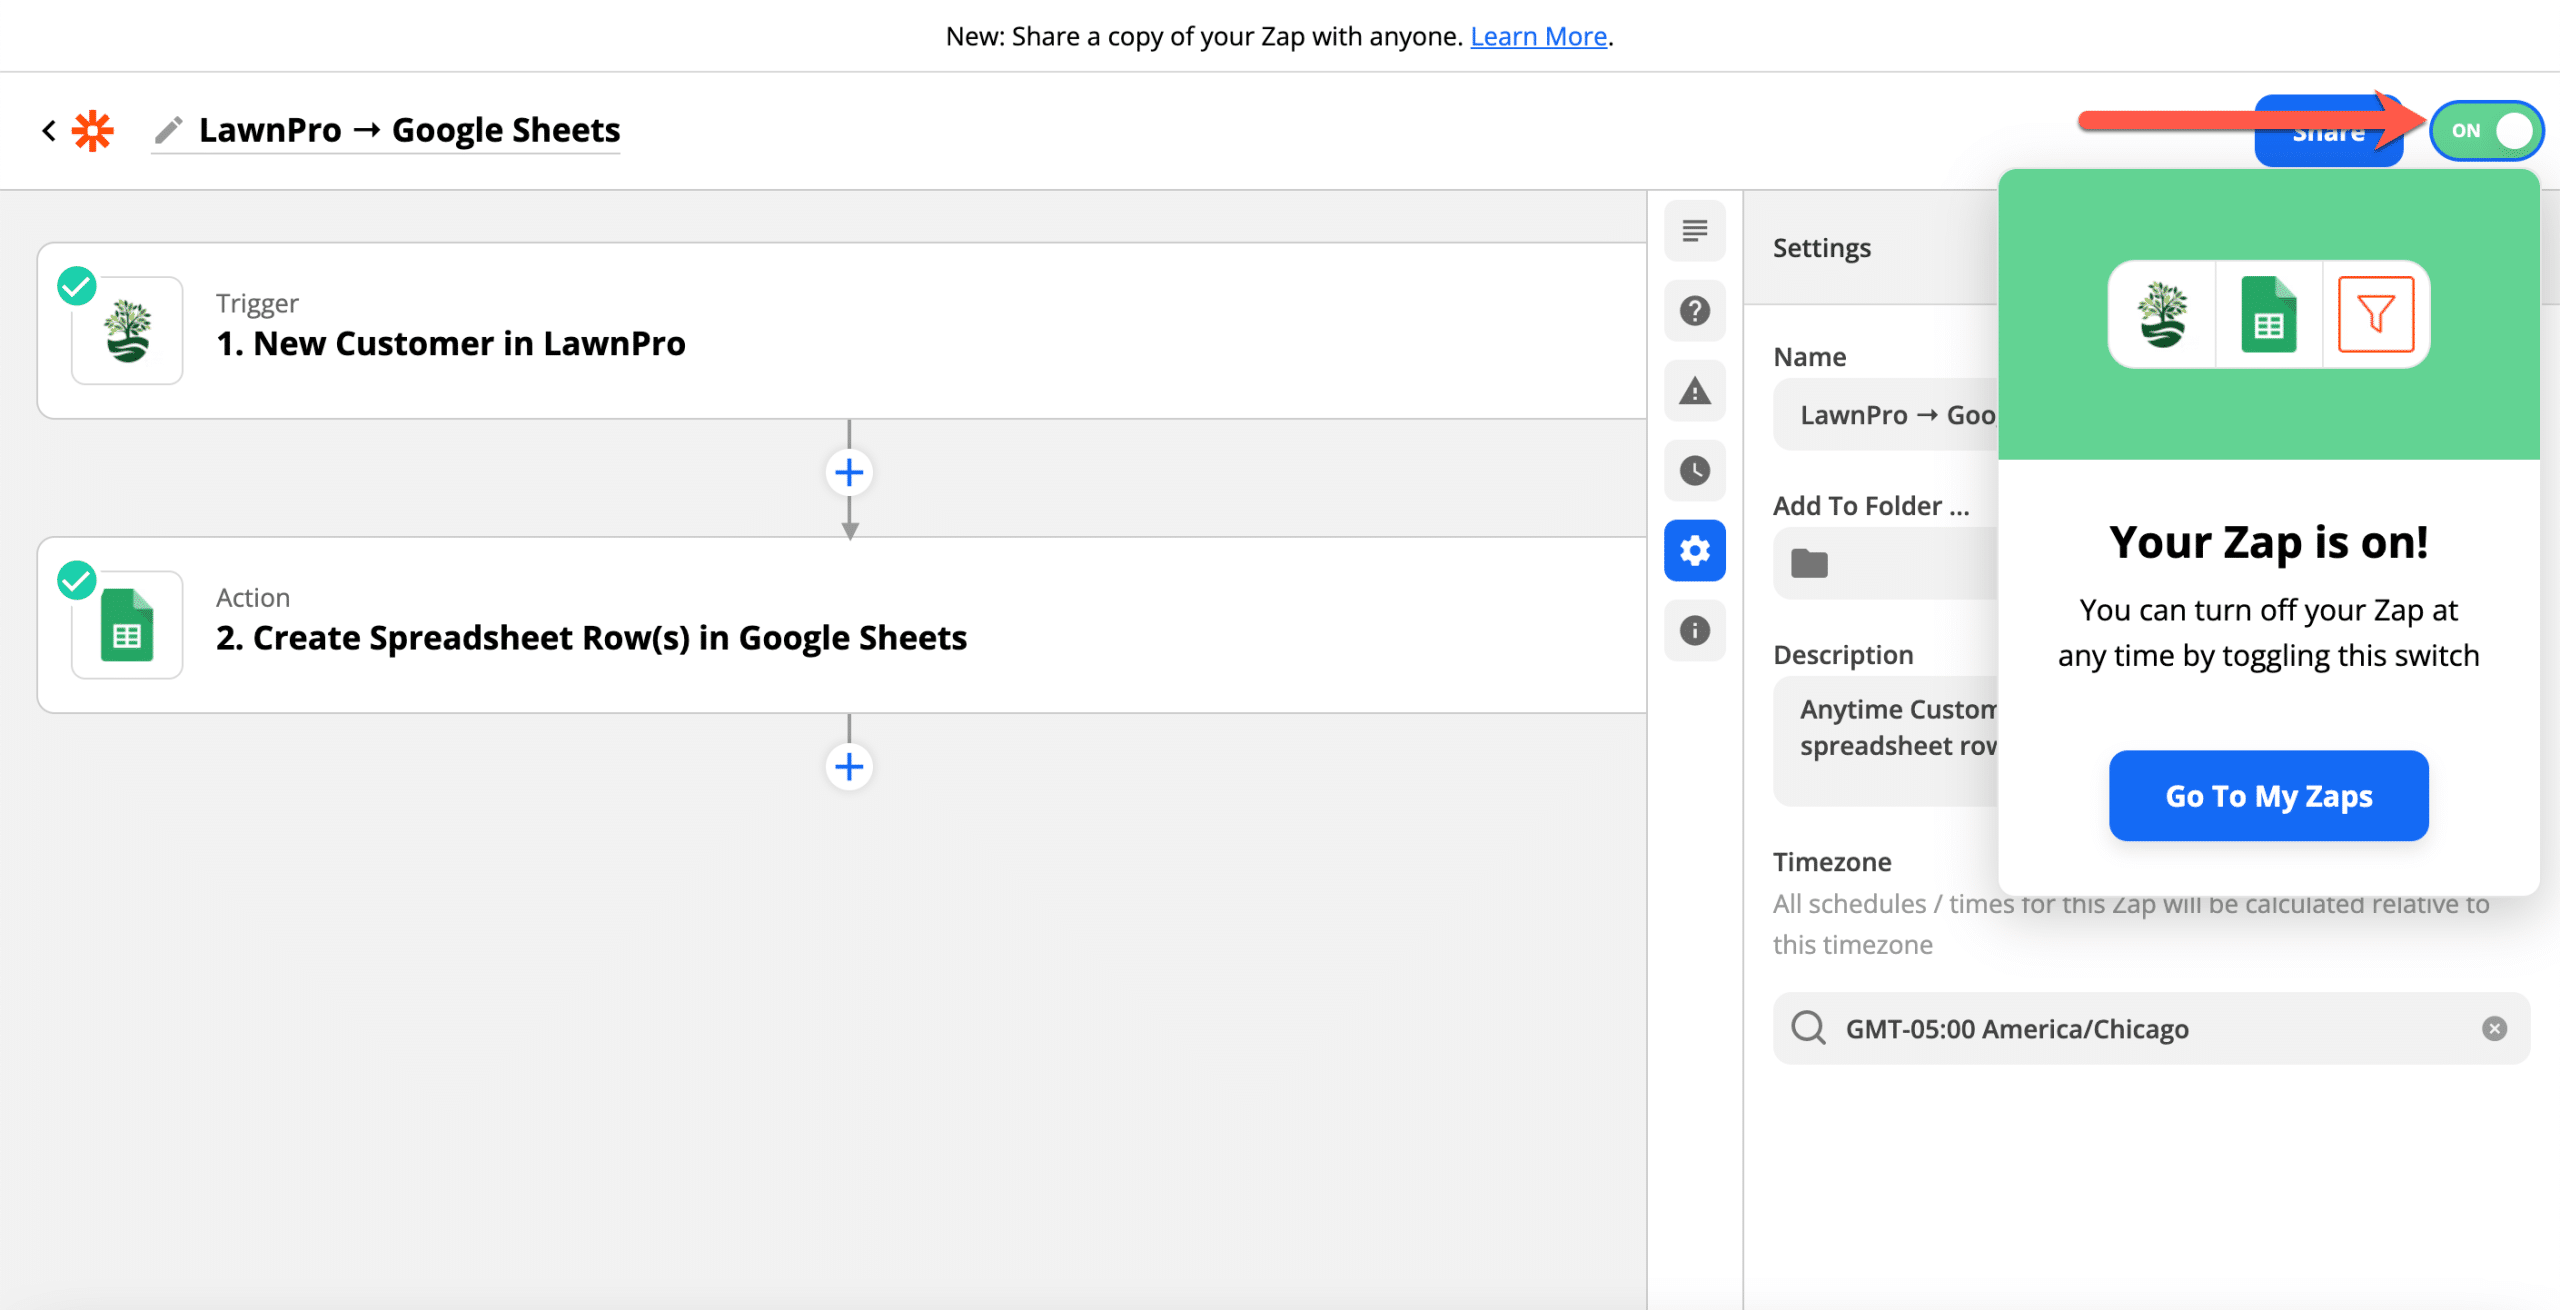
Once your Zap is turned on, Zapier will run your action steps each time your trigger event occurs. You can view a log of all your Zap activity, including all the data that goes in and out of each of your Zap steps, in your Zap History.