After you set up your Zap trigger, the next step is to add an action to your Zap. An action is an event your Zap performs when your trigger event occurs.
Example: If you want your Google Sheet to update every time you add a new customer in LawnPro, then the Zap action is to update your Google Sheet.
Steps to Set up a Zap Action
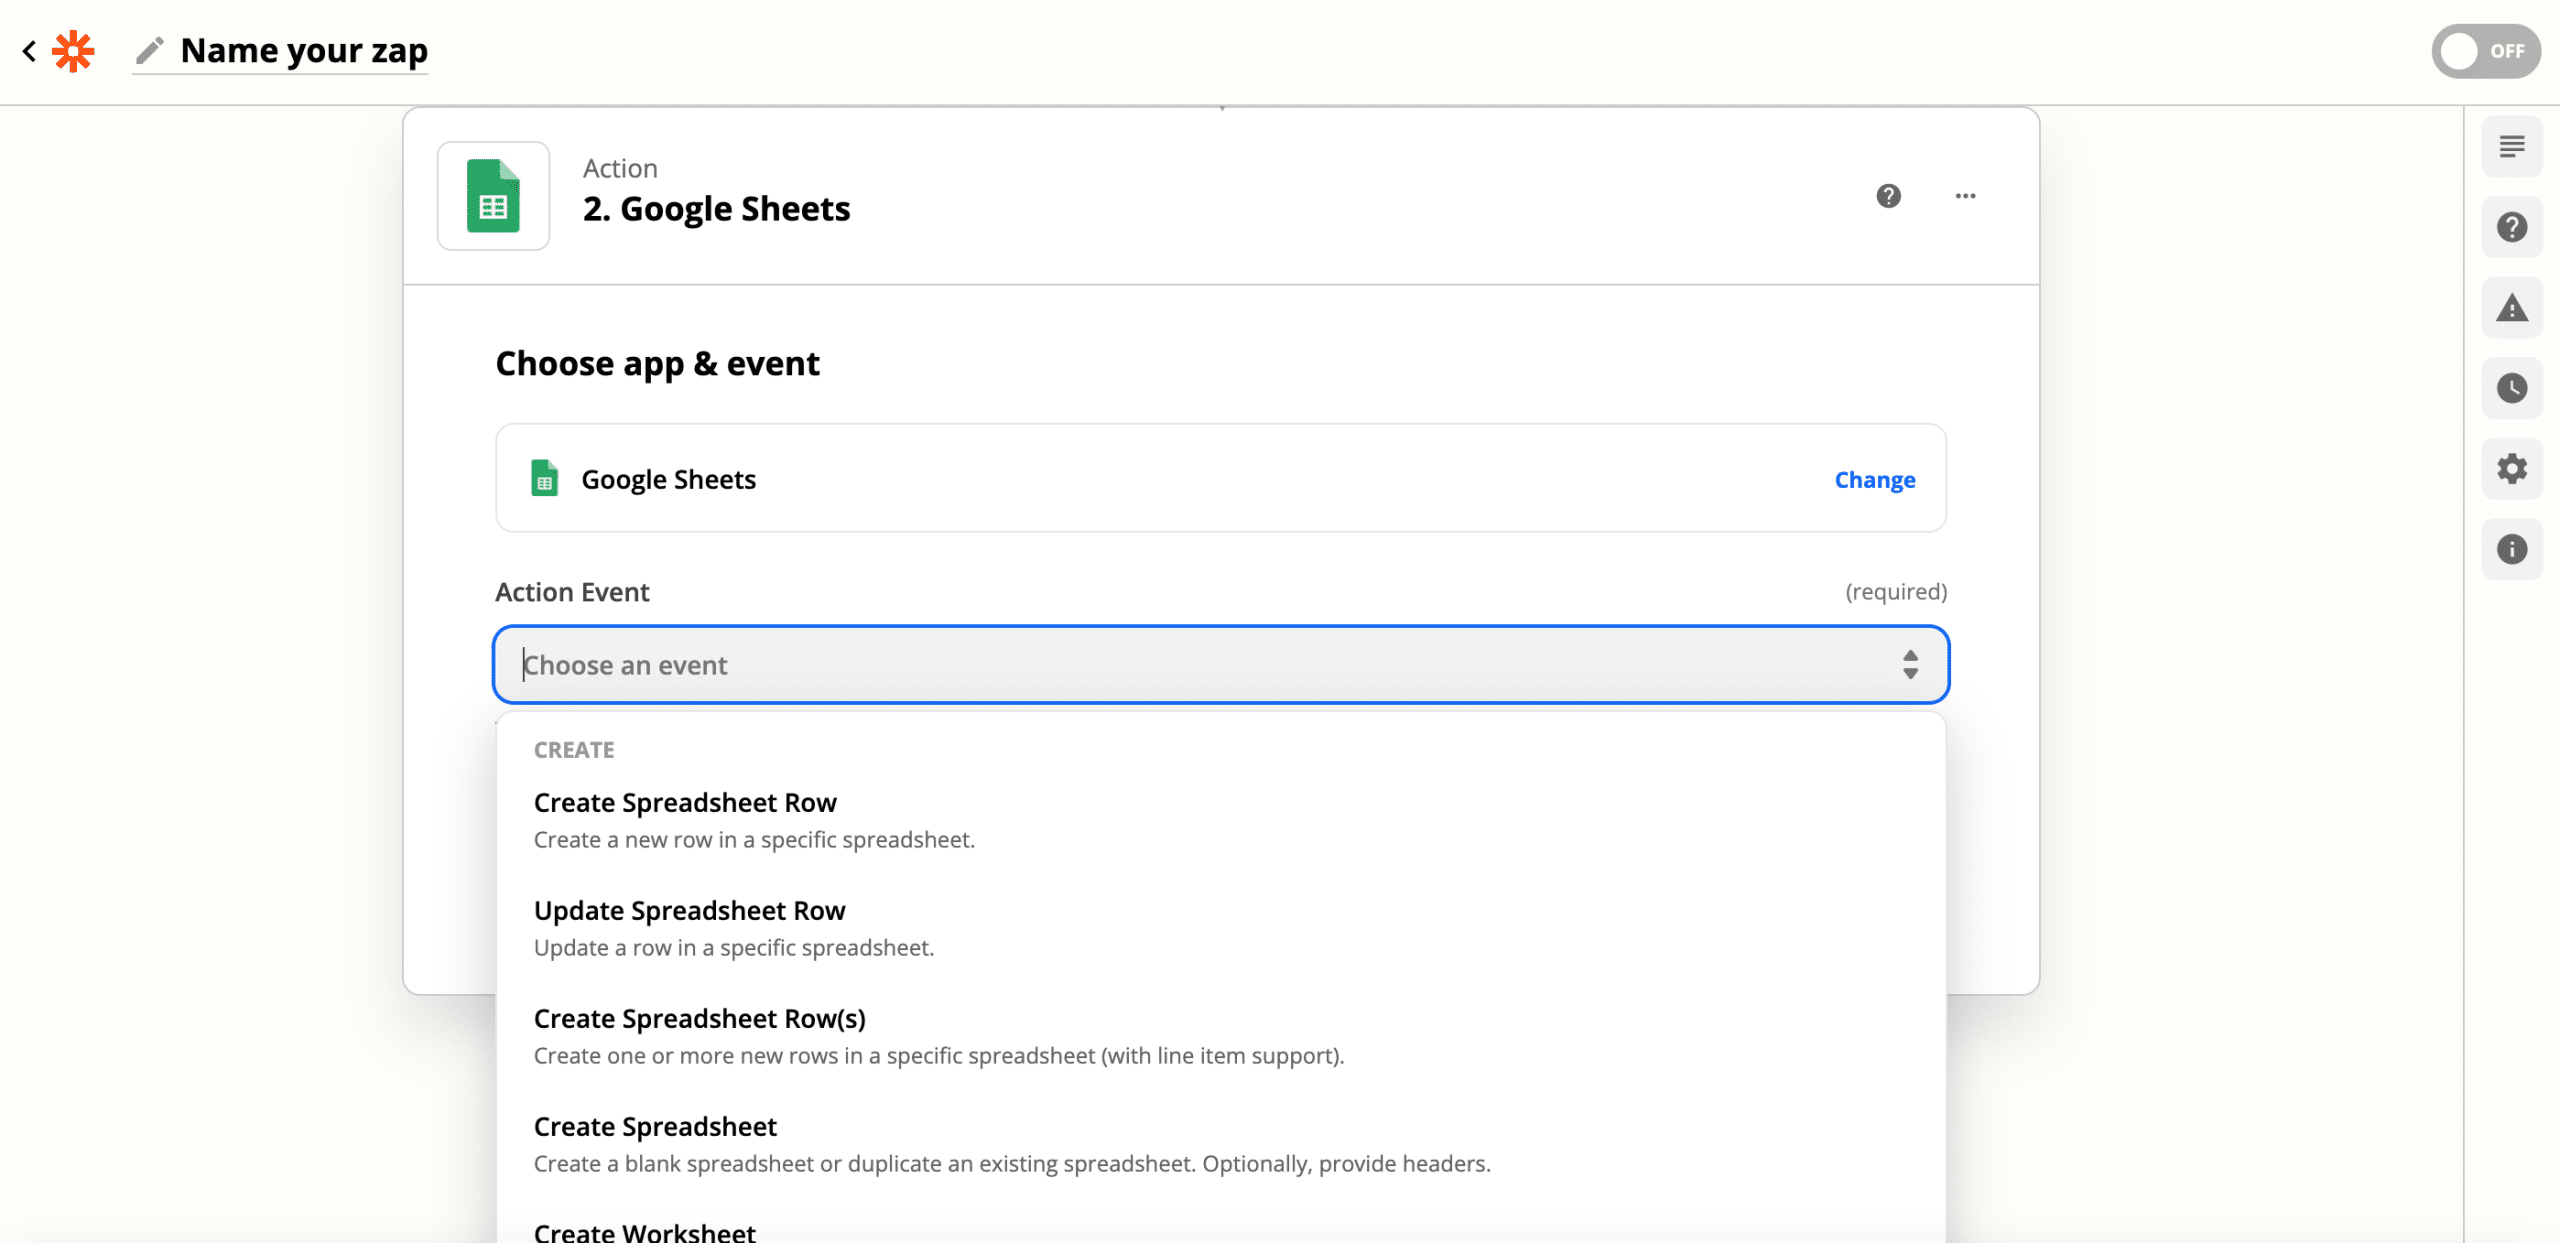
1. Choose your App and Event
– In the Zap editor, click the Action step, or click the plus + icon to add an action to your Zap.
– Search for or select the app you want to use in your action.
– Click the Action Event dropdown menu and select the action that you want your Zap to perform.
2. Connect Your Account
– If you already have an account connected to Zapier for the action app, select it from the account menu.- If not, click Connect a new account and follow the instructions to connect your app to Zapier.
– If the connection is working, click Continue.
3. Set up the Action
Next, set up the data that you want to send over to your action app.
In this step, you’ll see dropdown menus and/or form fields to fill in. Some are required, while others are optional. Different fields accept different types of data—for example, dates, text, or numbers—and there are three different fields types that may appear:
Dropdown menus: click the down arrow to select from a list of options.
Text fields: enter a value or map data from previous steps. To map data, click the dropdown menu and select a variable from the list.
For example, if you’re setting up an action to upload new Gmail attachments to Dropbox, you would map the attachment file from the trigger (New attachment in Gmail) to the action.
List fields: collections of text fields that let you send multiple values over. To send more than one item, click the empty field below the current field.
After filling in all required fields and any optional fields, click Continue to move to the final step.
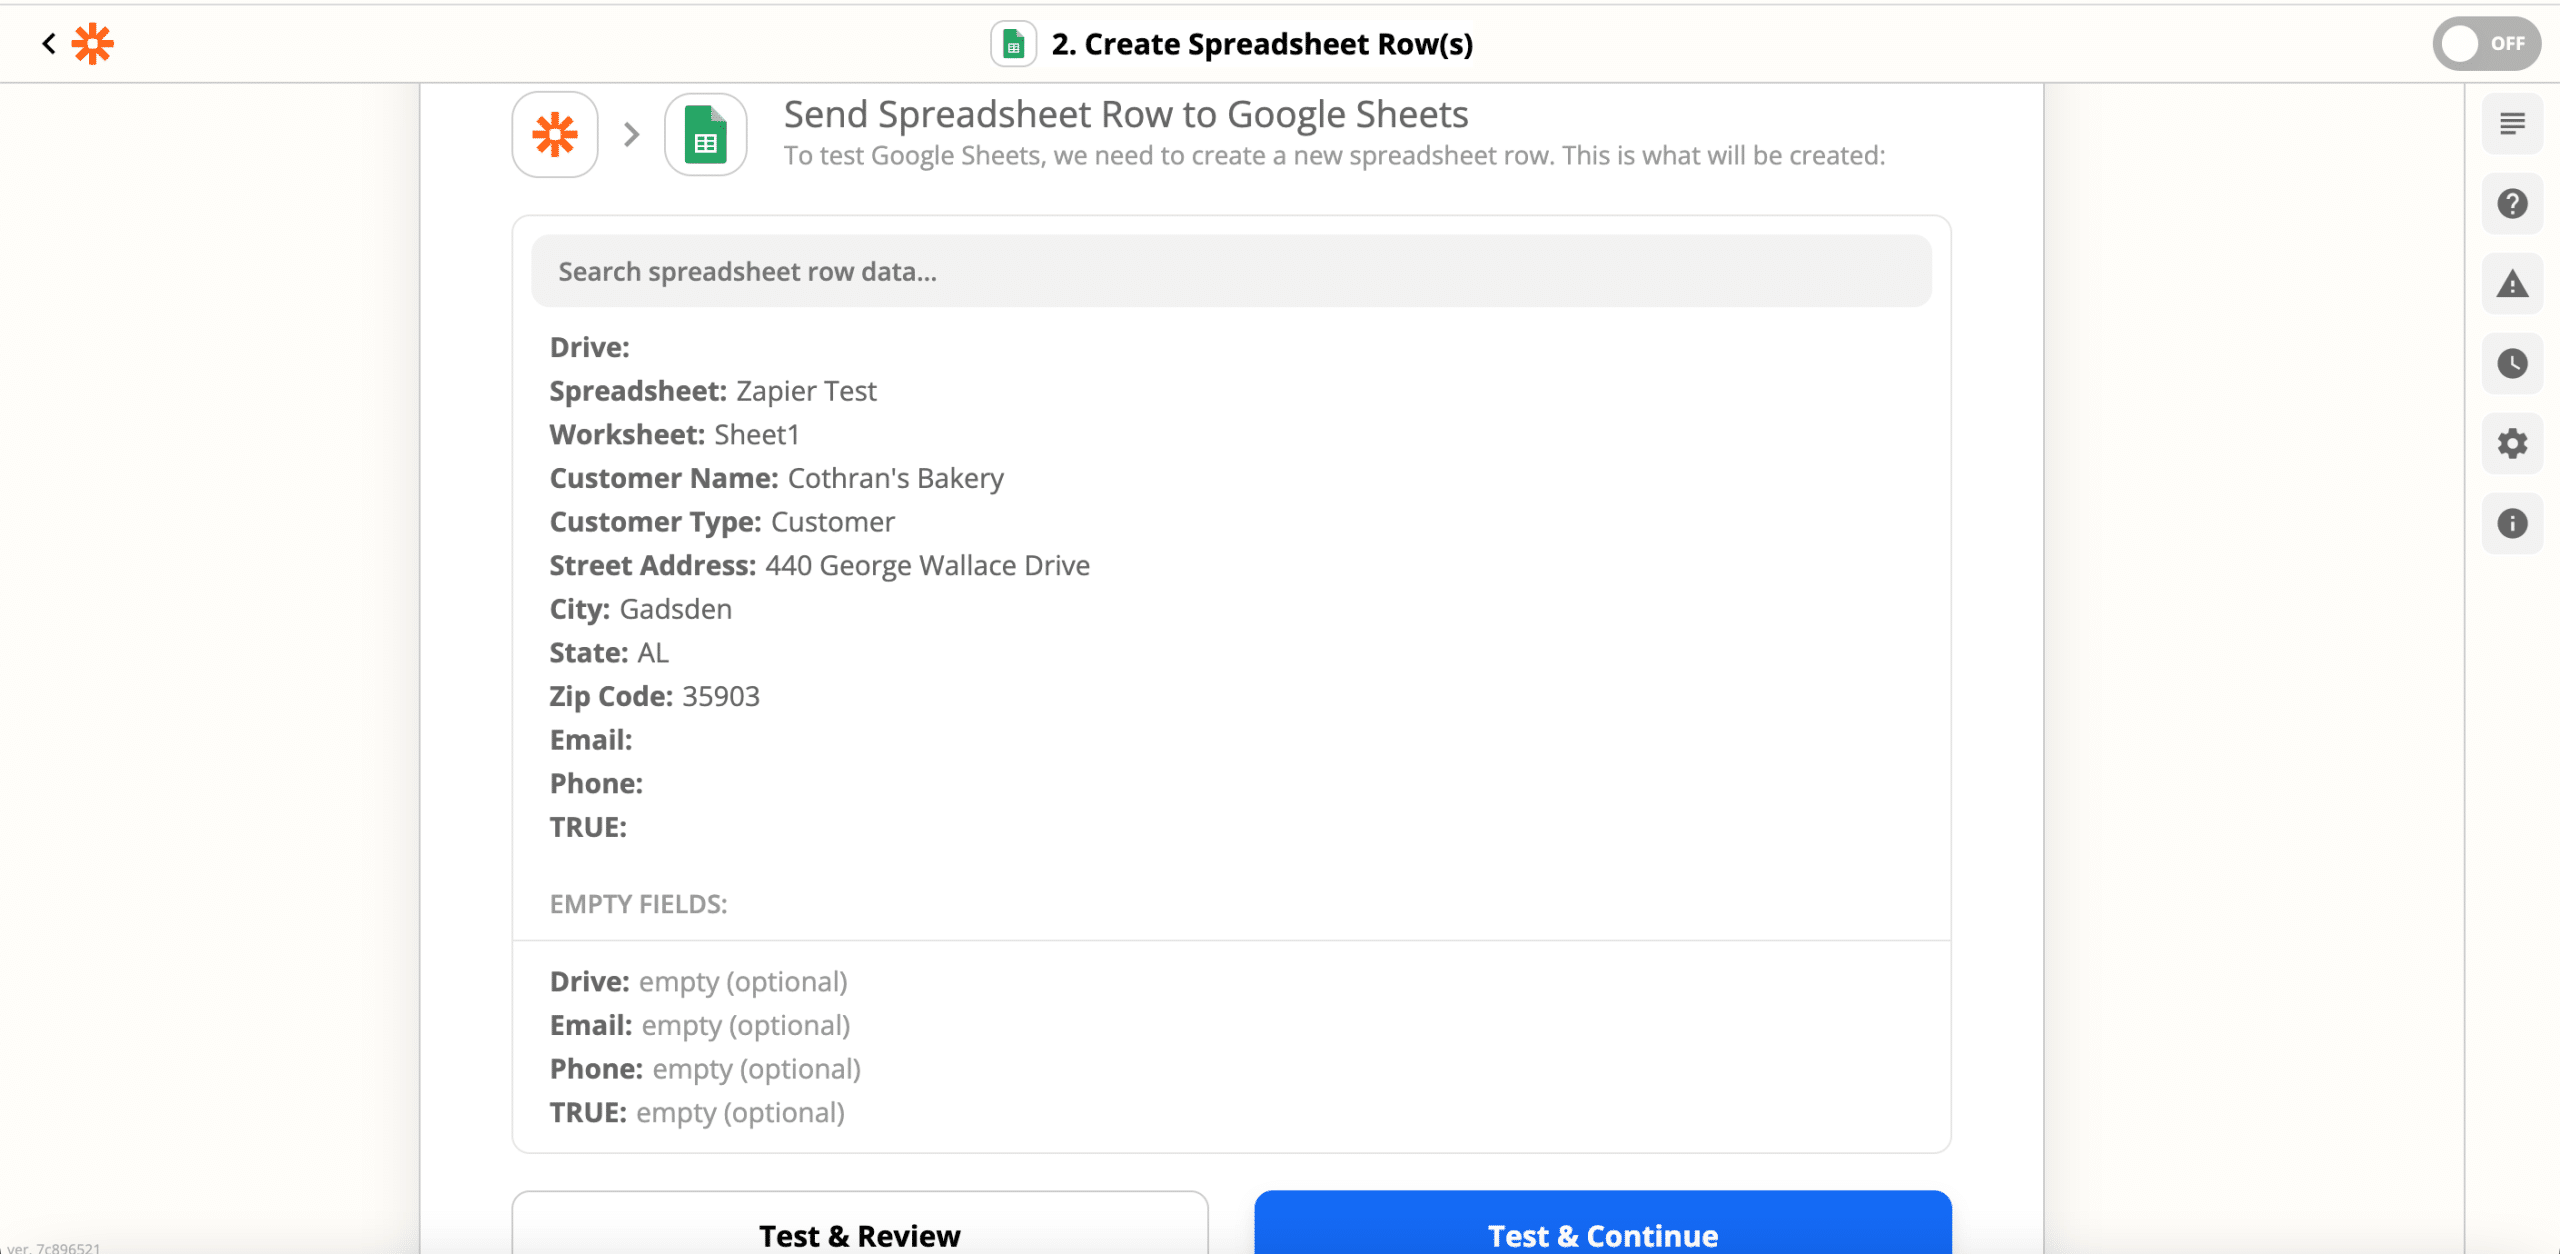
4. Test the Action Step
The final step is to see if your action works as expected. The first screen will show you the data input for your action, which is what will be sent to your action app.
To run the action step, click Test & Continue.
The next screen will show you whether or not Zapier was able to successfully perform the action step for you.
Click Turn on Zap.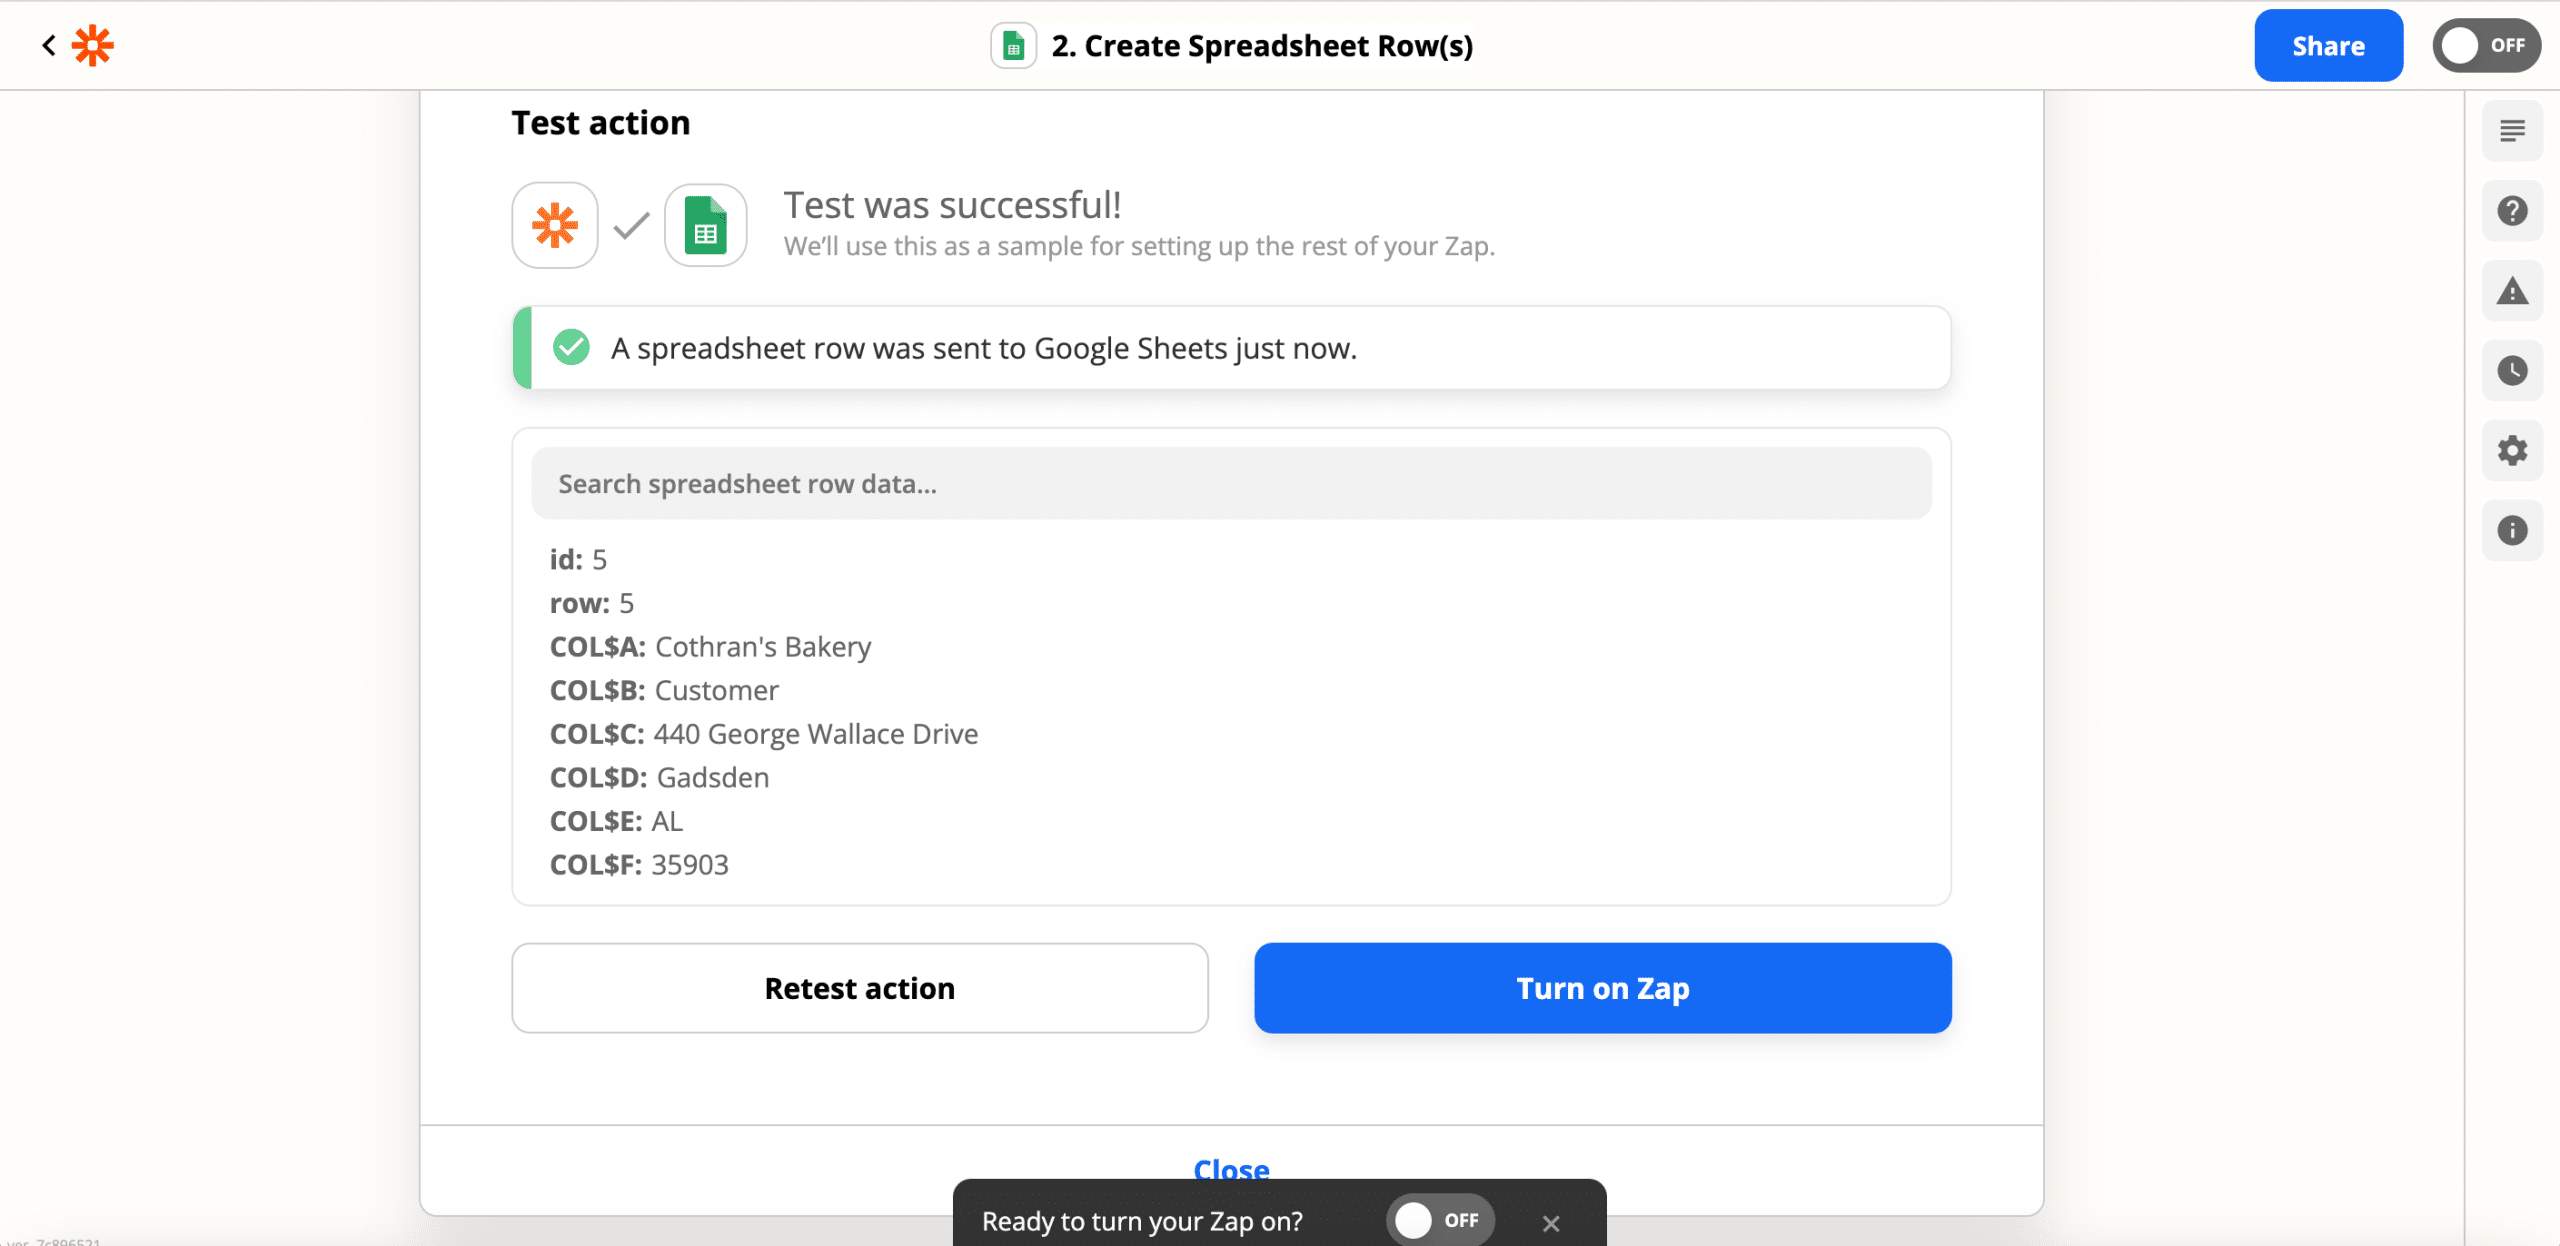
Once you’ve set up your Zap action, you can add another action or finish setting up the Zap.