Table of Contents
1. Adding a New Custom Field
2. Where You Will See Custom Fields
Overview
We know that all business aren’t the same and have different needs when it comes to assets (properties), chemical tracking, chemical applications, customers, equipments, estimates, events, invoices, or vendors.
You have the option to add your own custom fields for your team to use to these areas with LawnPro.
Note: These custom fields do not show on the customer side. It is only for you and your team.
Adding a New Custom Field
There are a couple different ways to add a new Custom Field.
The first way is by clicking the “Resources” tab and clicking “Custom Fields”
Next, click the green “+ New Field” button

Under Applies To, choose where the field appears: Assets (properties), Chemical Tracking, Chemical Application, Customers, Equipment, Estimates, Events / Jobs, Invoices or Vendors.
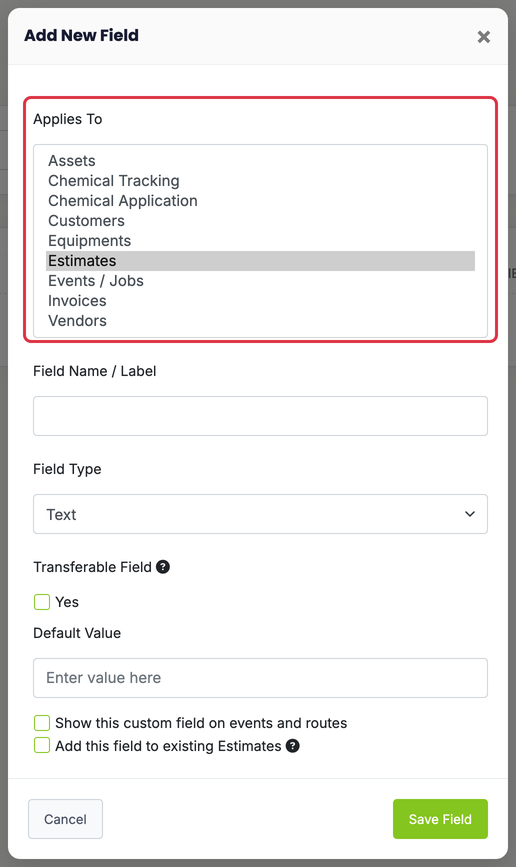
In this example I am adding a custom field to Estimates.
Next, enter the Field Name / Label. This is what will show when you see the custom field.
Then choose what type of field you want it to be. You can choose from text, checkbox, date, decimal, or integer.
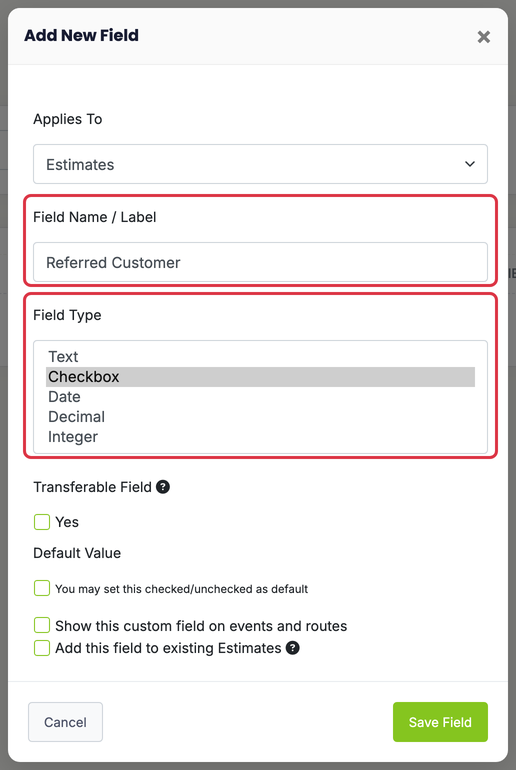
In this example the new custom field will be named “Referred Customer” and will be a checkbox
If you want the field to move with the work, example being you want it to move from the estimate, to the invoice so you can still see it, check the box to make it a transferrable field.
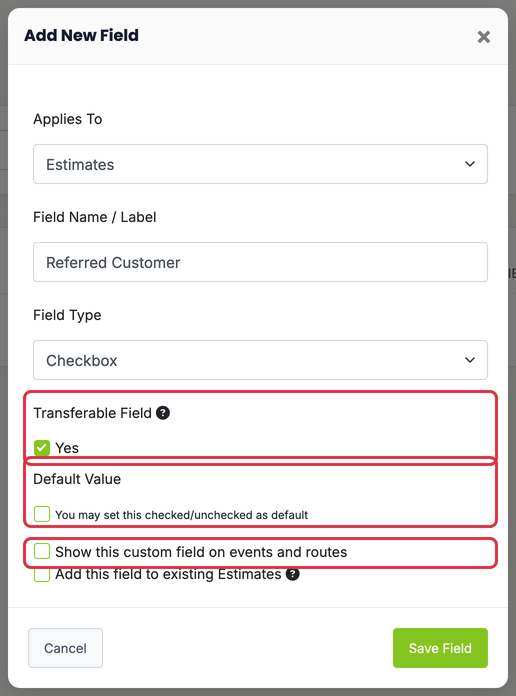
Next, select the default value. In this case, since it is a checkbox you will choose if you want it to automatically be checked or not.
Choose whether to check Show this custom field on events and routes.
To add the field to records you already have, check Add this field to existing records. Otherwise it only appears on new records. This option only shows for admins and users who can edit custom fields.
When finished, click the “Save Field” button.
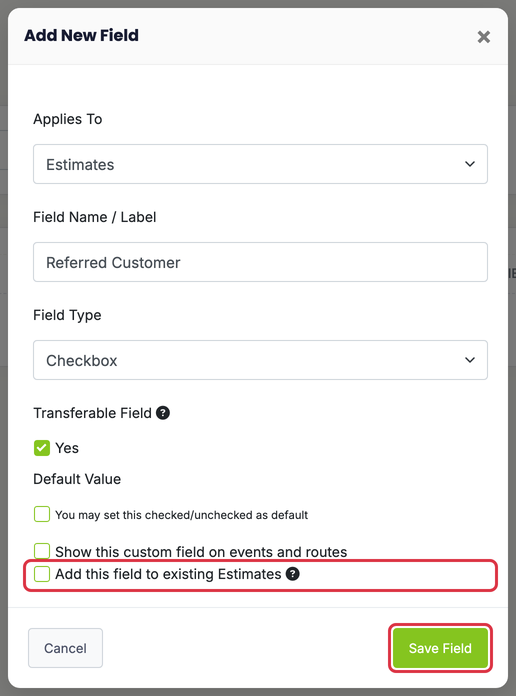
The second way to add a custom field is by creating a new estimate/invoice etc or editing an existing one.
Near the bottom of the form, click Add Custom Field.

Where You Will See Custom Fields
You will then see this new field when creating a new Estimate. At this time it is only visible on your end when you edit the estimate.
Note: Custom fields are only visible to you and your team, never to customers. A new field only appears on records created before it if you checked Add this field to existing records.